Note: This setup process is more easily done on a computer.
Before starting configuration - please check your device compatibility and supported configurations.
Sungrow data is delayed by about 6 to 11 minutes due to the performance of the Sungrow API. Unfortunately there is no way to improve this. Solar tracking should still work quite well despite the delays.
As March 2024, there are two versions of the Sungrow Portal, Old and New. Users can switch between the two.
Depending on which version you're using, skip Step 1x or Step 2x.
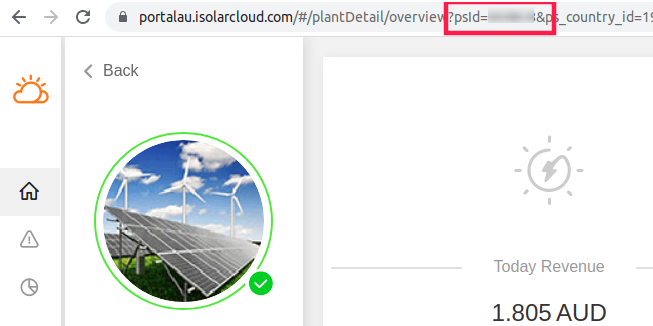
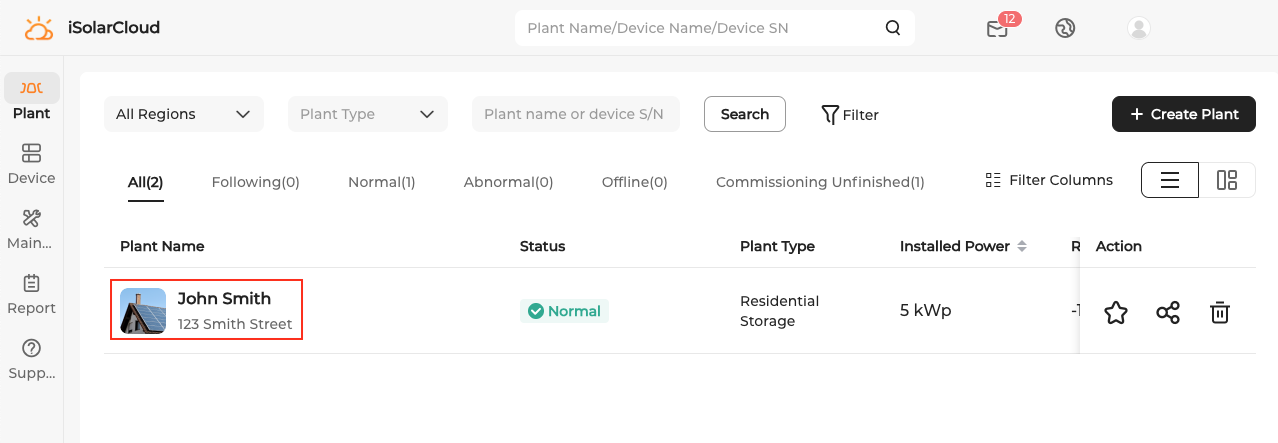
Login to Sungrow iSolarCloud and select your site (aka "plant").

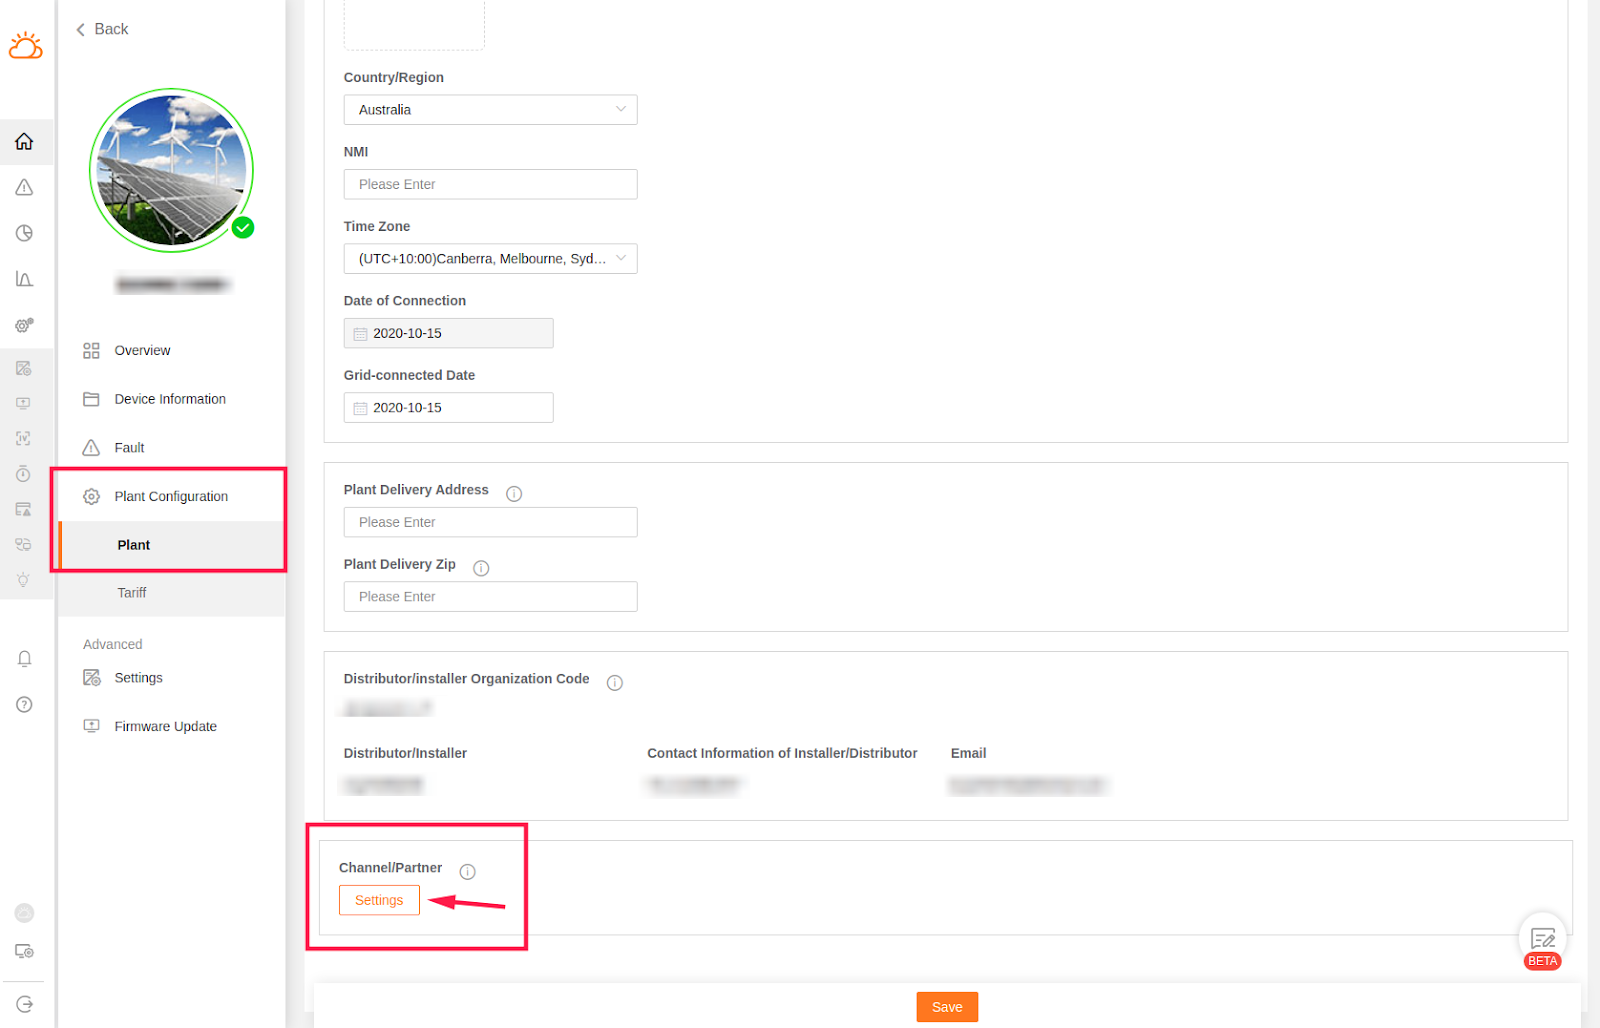
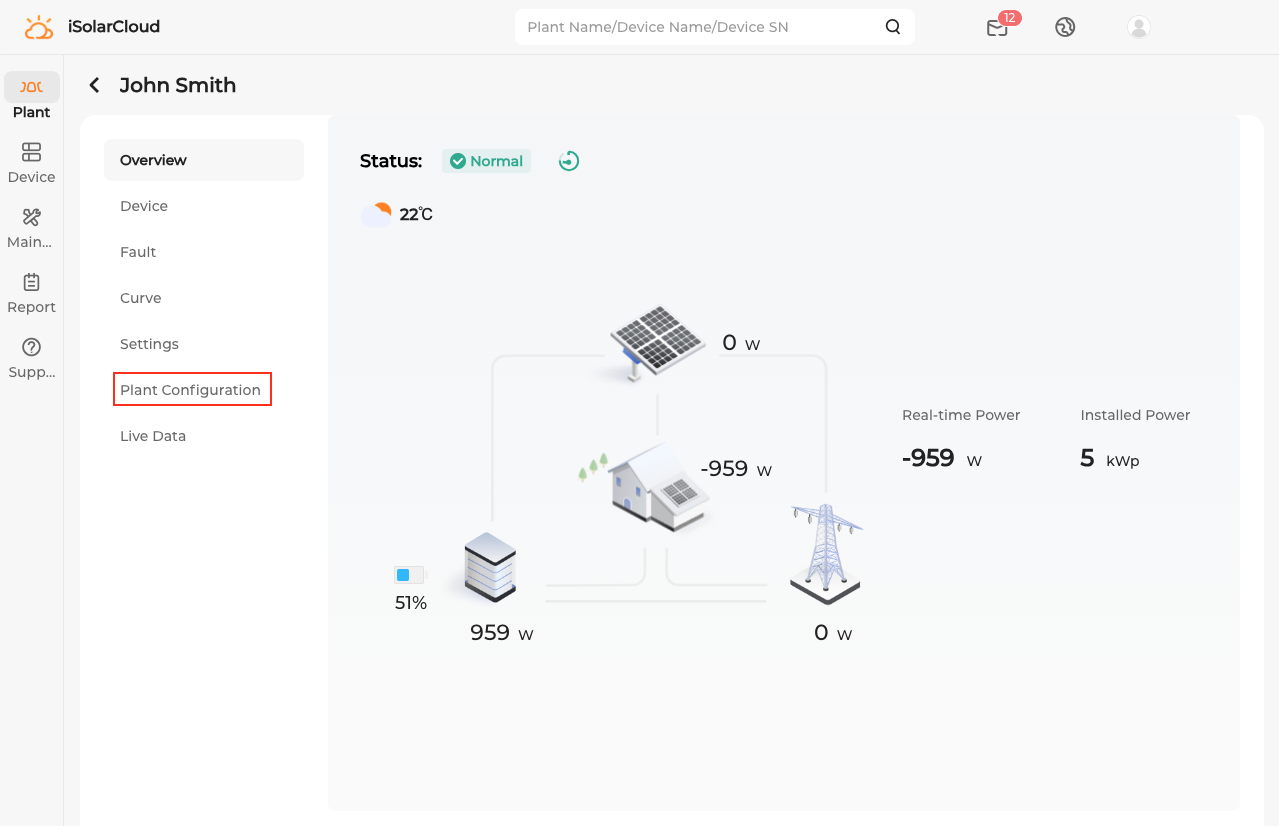
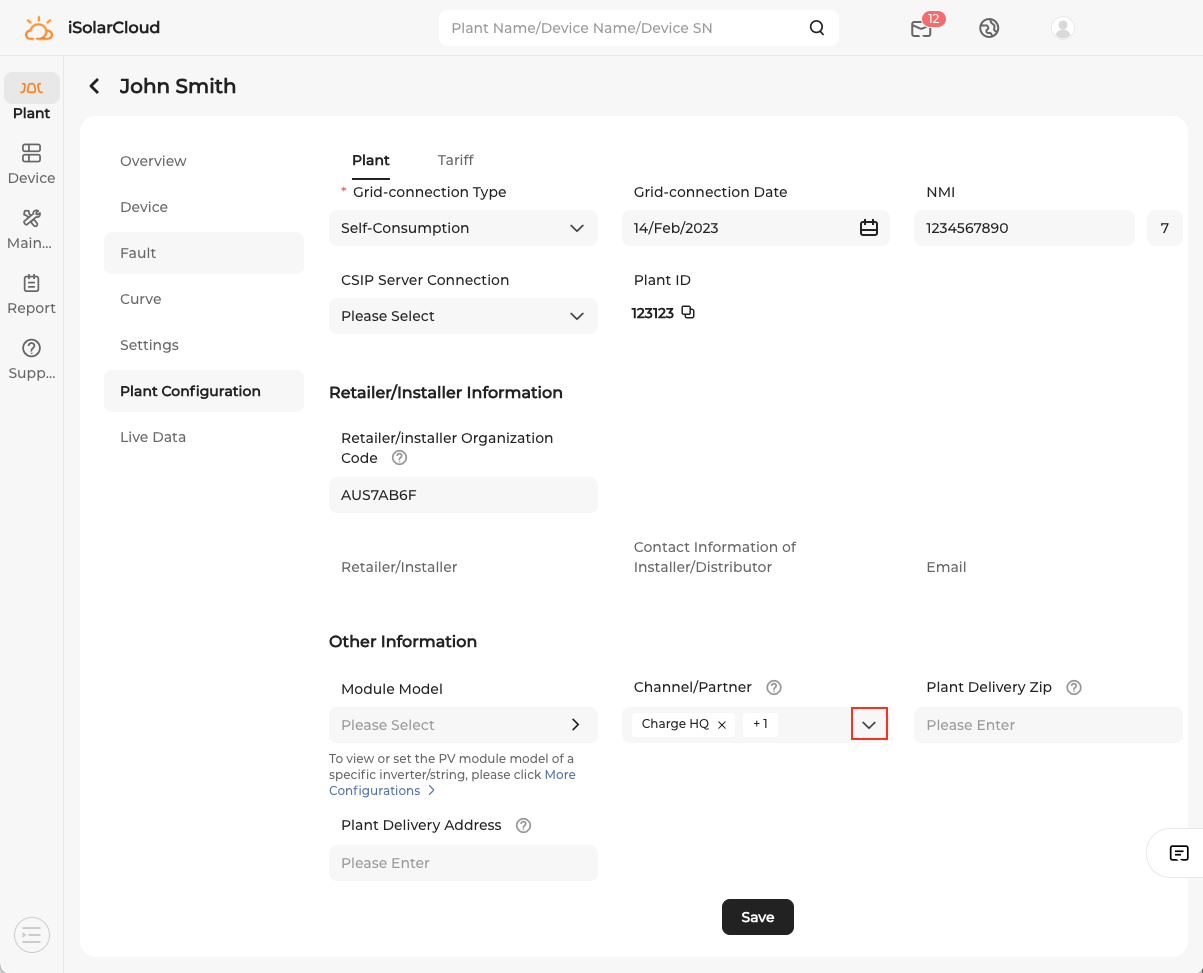
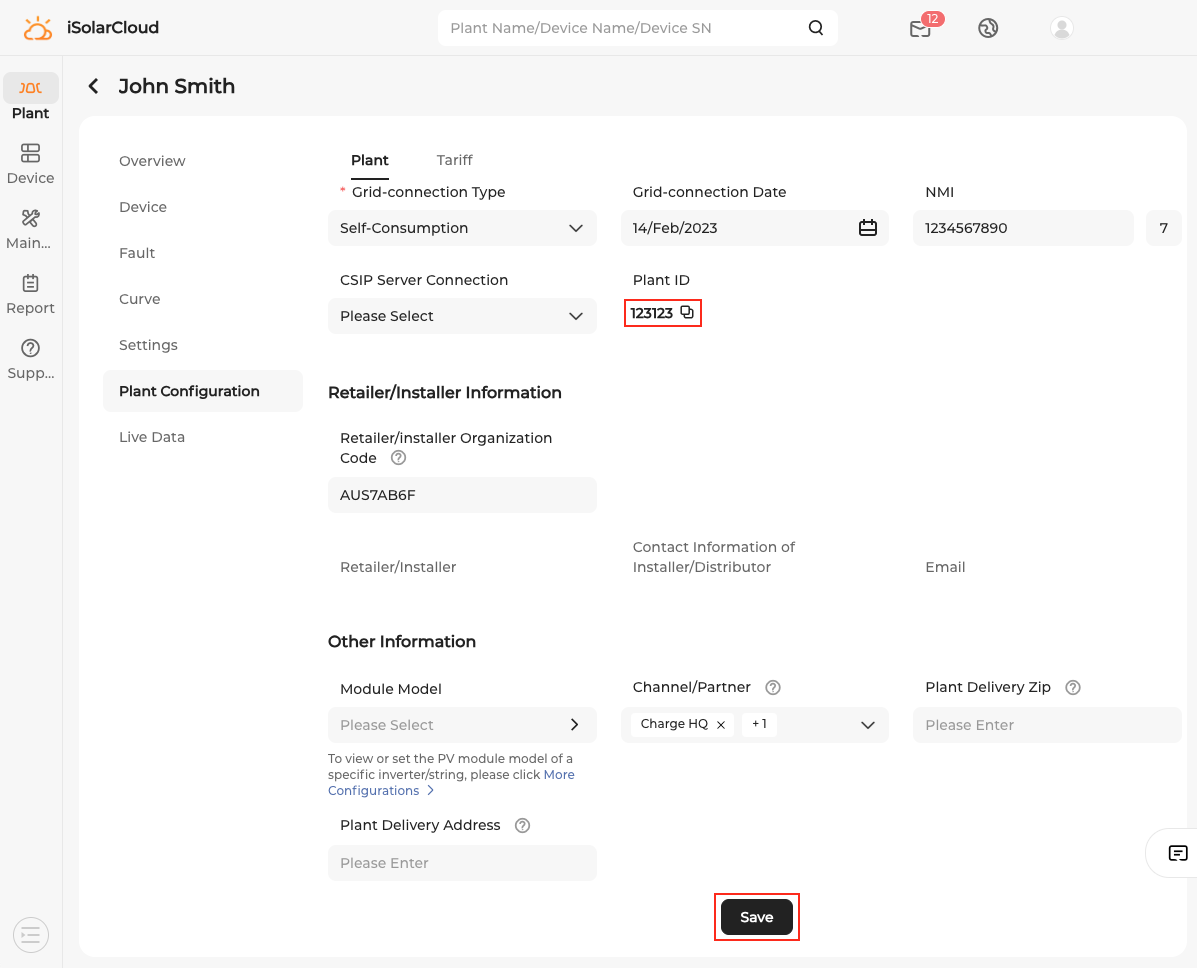
Navigate to Plant Configuration -> Plant.
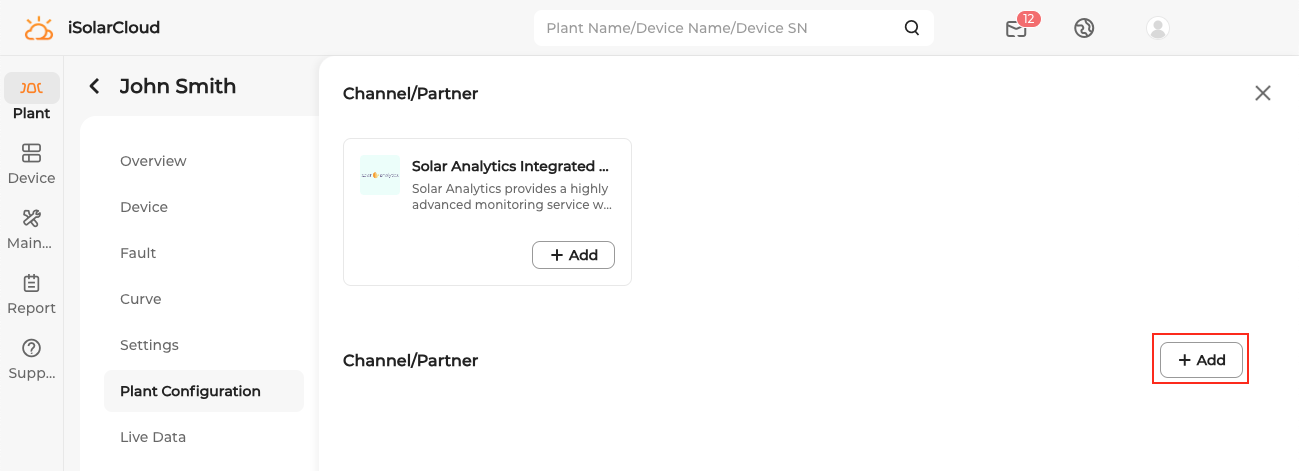
Scroll down to Channel / Partner.
Click Settings.
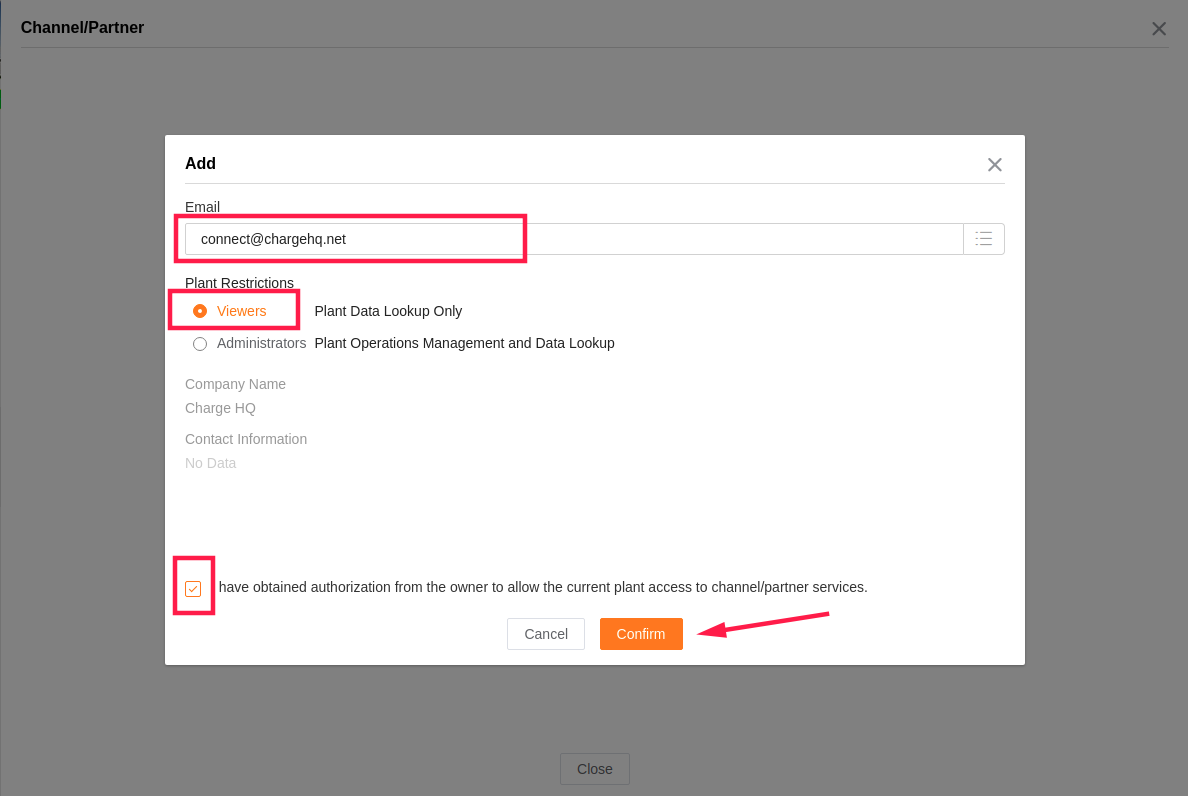
Click Add.
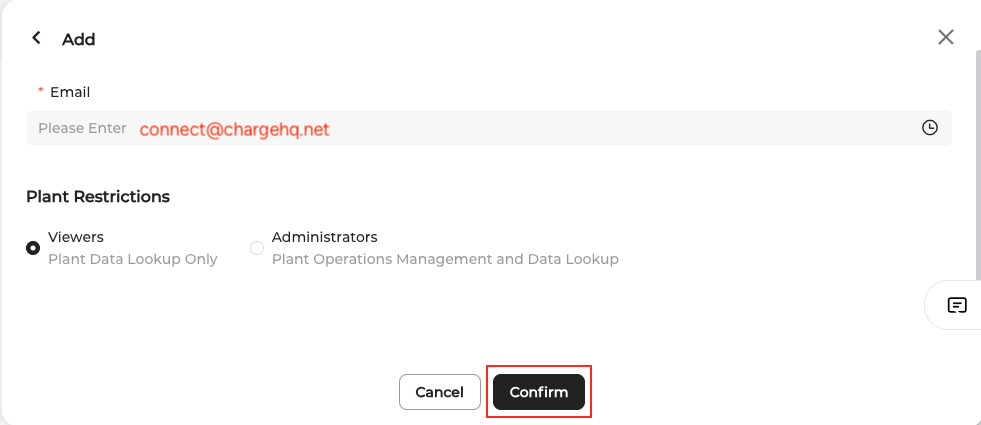
Enter connect@chargehq.net in the Email field.
Leave Viewers selected.
Click Confirm.
This grants Charge HQ read-only permission to access your iSolarCloud data.
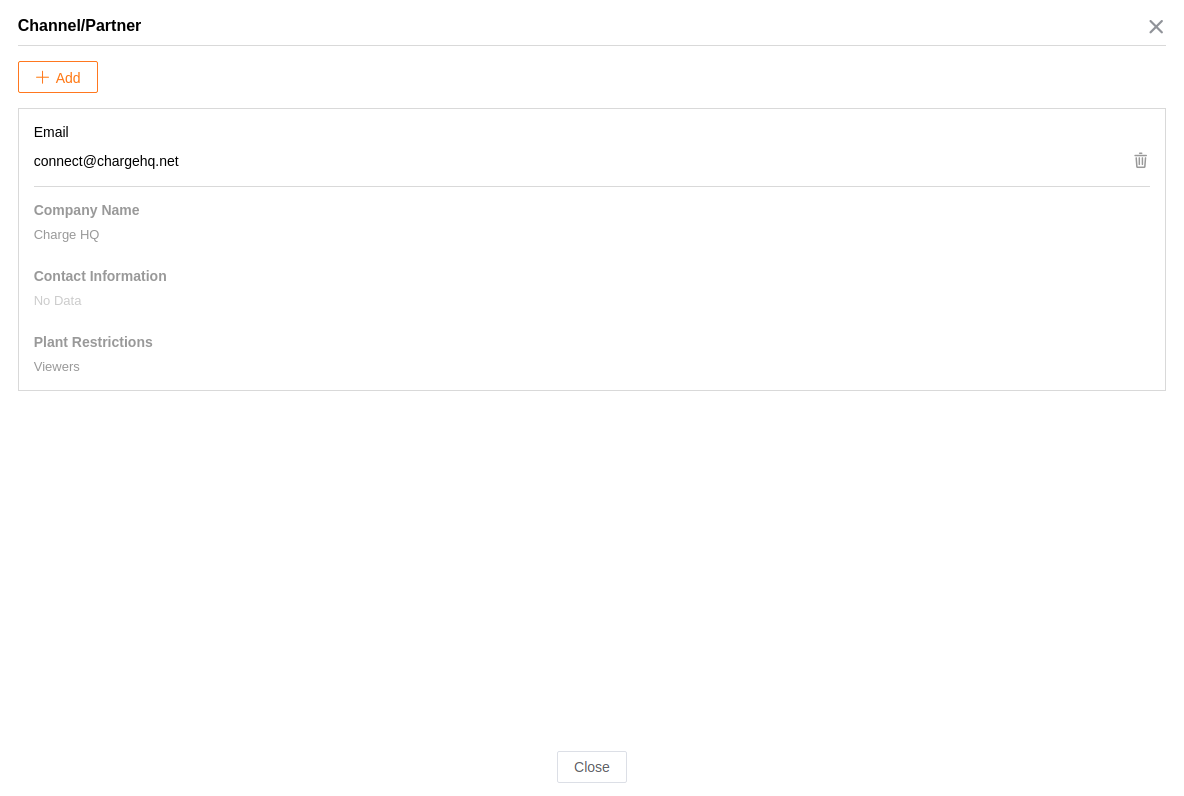
Confirm the settings look like this.
Select the plant from the list
Select Plant Configuration from the menu
Click the drop down arrow for Channel / Partner at the bottom of the screen
Click Add on the bottom right

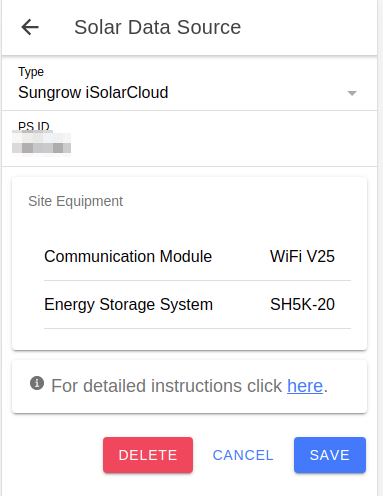
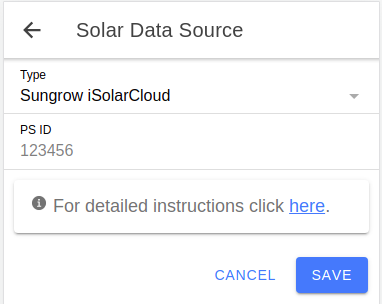
In the Charge HQ app, click My Equipment -> Solar Data Source
Select Type: Sungrow iSolarCloud.
Paste your Plant ID / psId value from step 1 / 2 above and click Save.
You should see a success message if it works.
Charge HQ will now be receiving data from your Sungrow inverter, and the solar tracking settings should now be visible on the Charging Settings screen.
If you go back into My Hardware -> Solar Data Source it should now display your Sungrow devices, eg: